This guide explains how to use Voteer within Microsoft Teams to run secure and seamless voting.
Participants can vote directly during live meetings or within team workspaces, without leaving the Microsoft Teams environment.
🔹 Before You Start
Before using Voteer with Microsoft Teams:
- Create a Voteer account
- Set up your organization
- Create your ballot in Voteer Backstage
👉 You can start for free (up to 25 voters)
👉 Sign in to Backstage to get started
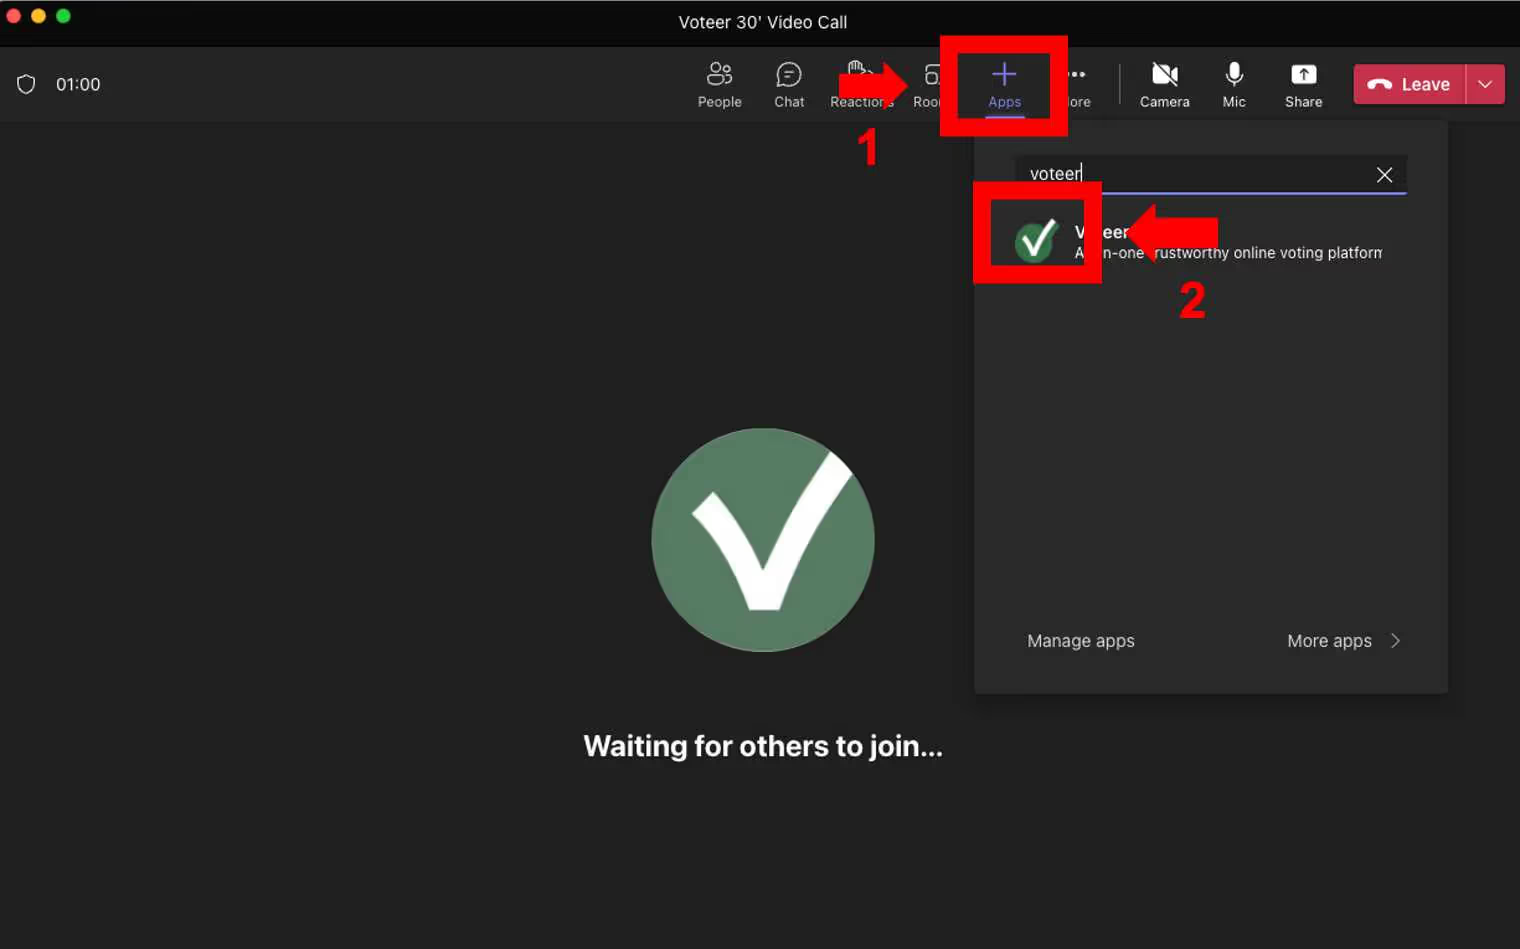
🔹 Step 1 — Add Voteer in Microsoft Teams
- Open Microsoft Teams
- Go to your meeting or team workspace
- Click on Apps
- Search for Voteer
- Add the Voteer app
- Accept the required permissions
👉 Voteer is now available within your Teams environment
👉 If Voteer is not available in your Teams app store, your IT department may need to enable access before you can install it.
Important: The Voteer integration in Microsoft Teams is only for voters. Organizers must remain connected on Voteer Backstage to open, manage, and close the vote.
🔹 Step 2 — Automatic Voter Authentication
The integration with Microsoft Teams allows for simple and secure voter authentication:
- When a voter is signed into Teams with the email address from your voter list, authentication happens automatically.
- If the voter is not logged in with the matching email, they will be prompted to enter their voter code to participate.
This ensures a seamless voting experience while keeping the process secure.
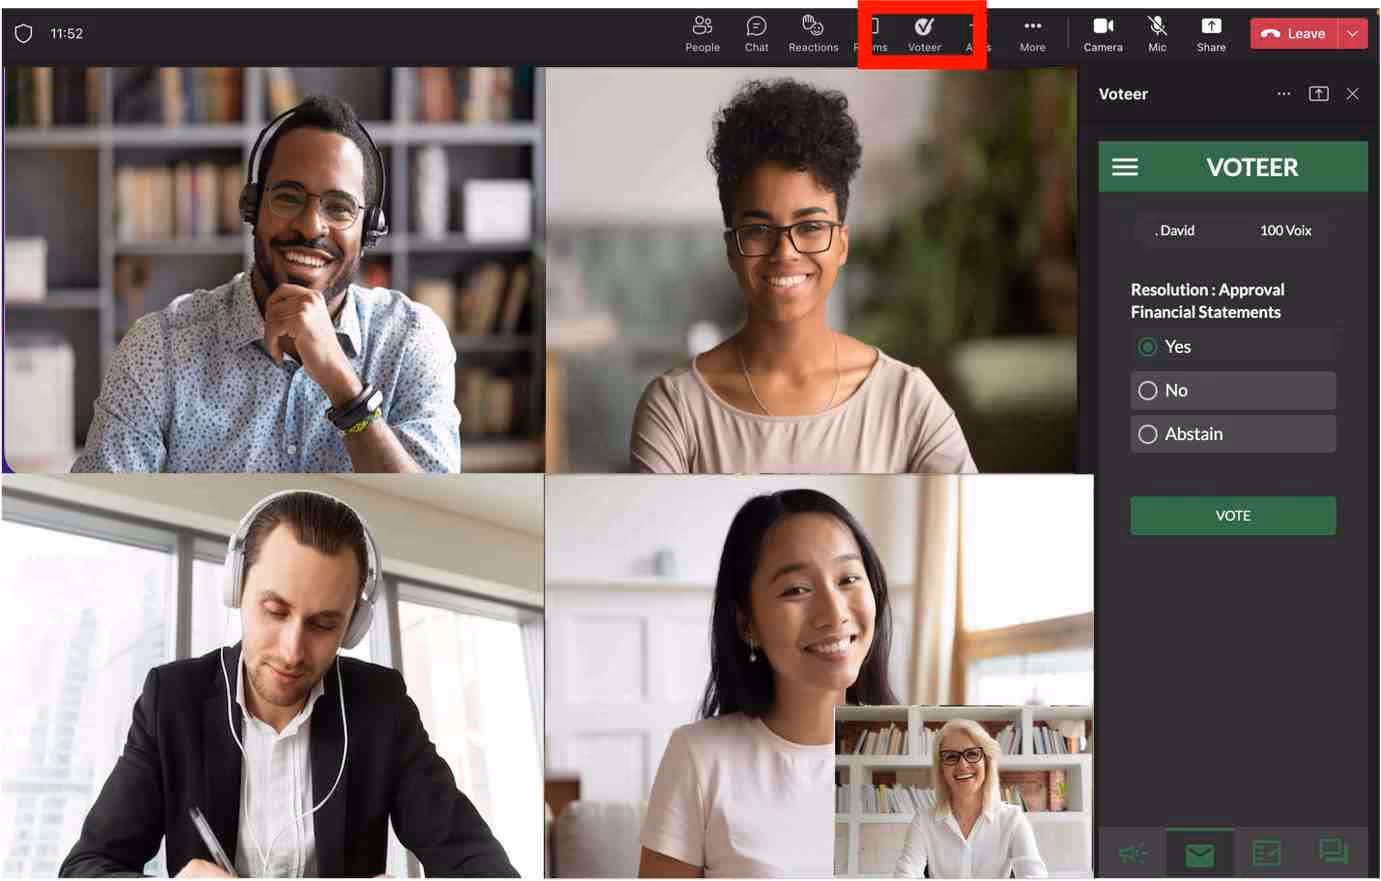
🔹 Step 3 — Start Voting
Once Voteer is available in your Teams meeting or workspace:
- Open the Voteer app
- Share the ballot with participants
- Start the voting session
Participants can vote directly within Teams, without switching tools.
🔹 Additional Information
- Ensure participants are properly authenticated in Teams
- Test your setup before running a live vote
- Check permissions and access settings
🔹 Support
Need help?
👉 Contact: support@voteer.com
👉 Or use the live chat available on the Voteer homepage and backstage